I have been getting back in to my studying a lot lately and one thing I have found is the need to use a lot of debug commands so I can watch what is happening during things like routing updates and neighbour formation. One thing I do find though is that I am forever having to turn debug on and off, forgetting to do one or the other, and when it is on it clutters up the screen a breaks up the config I am entering making it difficult to read back.
Which got me thinking, I have used syslog servers a lot in the past, so why not send all the debugging out put to a syslog server and turn of logging to the console? This way I can have all the debugs in one place, and keep the console of the devices tidy so I can see what I am doing.
Now if you are doing this through GNS3 you will need a cloud connection so your PC can talk to your GNS3 network. If you are not sure how to do this there are lots of videos and walk though on the net, however the one below is one of the best I have found, very clear and complete.
How-To: Using the Cloud in GNS3 to Provide Internet Access from Matthew on Vimeo.
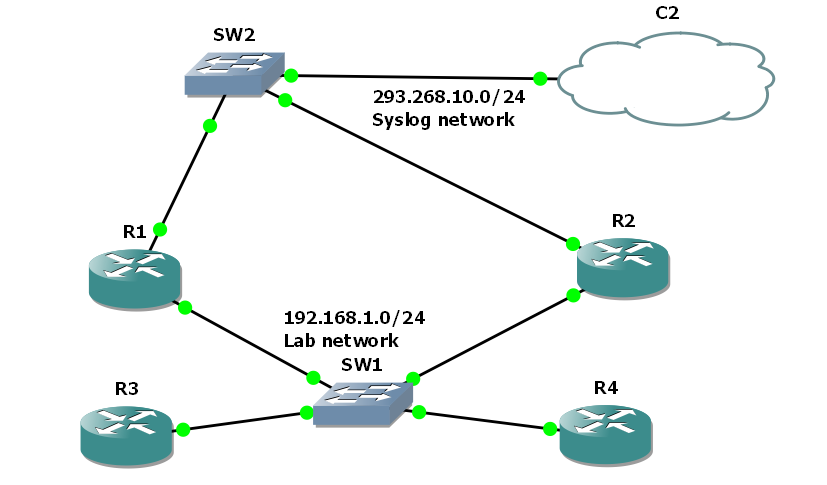
So once you have your cloud set up you then need to set up a simple GNS3 topology, Here I have set up 4 routers running OSPF connected through a switch as I am looking at the DR and BDR election process.
I have given R1 and R2 F0/1 address 192.168.10.10 and 192.168.10.20, and the loopback adapter used by the cloud is 192.168.10.254. Once the routers are booted and connected to the cloud, check they can ping the loop-back address (you may need to disable your fire wall on the loop-back connection.)
then of course you will need a SFTP server, in windows there are two good free choises, for a realy simple server that can run with out install try, http://tftpd32.jounin.net/tftpd32.html simple but does all you need, just make sure you disable dhcp and other none necessaries services in the settings. For a more complete tool try http://kiwisyslog.com/, they have a free syslog server offering that allows filtering and more.
In either case set it up and insure it is listing on the loopback interface, in the case of TFTP32d this is simple a case of choosing the interface from the drop down list.
Finale we need to change the logging setting of R1 and R2 to direct debugging message to the syslog server and not to the console. Remember debug messages are level 7 so we need to set console logging to level 6 or lower and trap logging to level 7. the following code will do just this from global config mode.
#logging 192.168.10.254
#logging console 6
#logging trap 7
So now we can enable the debugging and reset the neighbour relation ships to see what it looks like.
From the console
So not much there apart from we see the neighbours bounce as I clear the OSPF process.
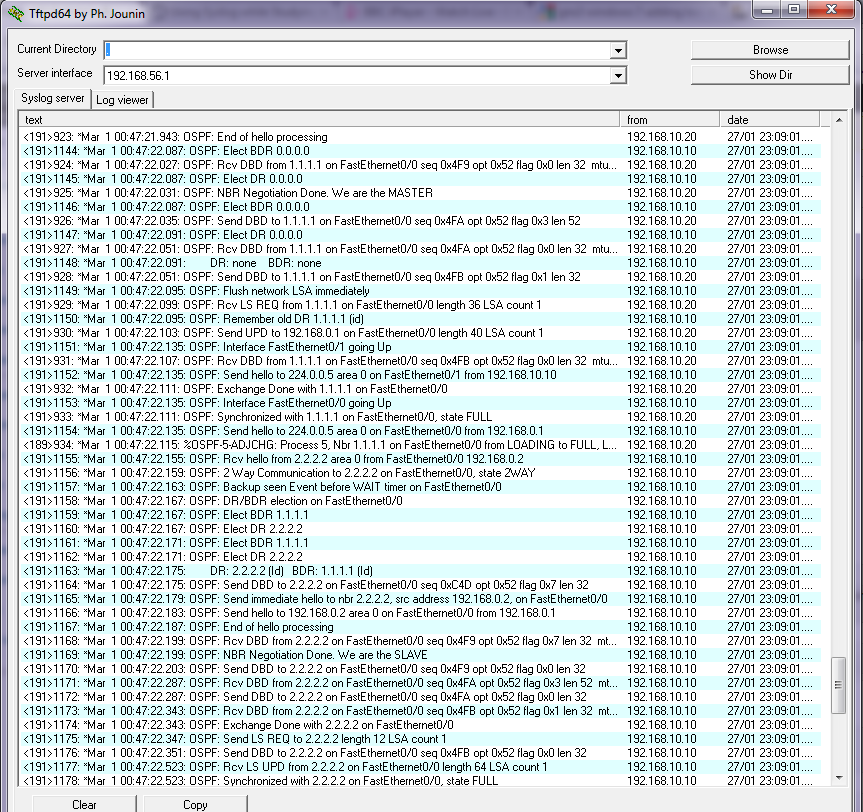
So how about on the syslog server??
So here are all our debug messages, for us to scroll through and review at our leisure, If you have something like Kiwicat syslog server you could filer them in to views, based on device that sent it, or text with in message, ect.
You need to make sure of course that you either have the device connected directly to the syslog server network, or it has a route to get there. Directly connected is always best of course as you will insure that as long as that interface on the device is up you will catch all messages. On real hardware simply use a spare switch or create a separate VLAN and do exactly the same thing.
I have found for large labs this works great, indeed for testing setups for clients its great as well. once you have insured the correct debugging is enabled you can walk though test scripts and plans, safe in the knowledge that you have a full detailed log of every thing that has happened.
Simple to set up and hopefully some of you will find it useful.
DevilWAH


